Photography is a two dimensional medium which we use to represent a three dimensional world. The basic visual cues that allow us to infer the third dimension in a photograph include:
Size — whenever we have familiar objects in the frame, we use their relative size as a clue to their relative distance from us.
Focus — Something which is sharply focused in an image will be perceived as being either closer or farther away than something which is clearly out of focus.
Visual cues such as receding lines — the familiar illusion created by the lines a highway that appear to converge into the distance.
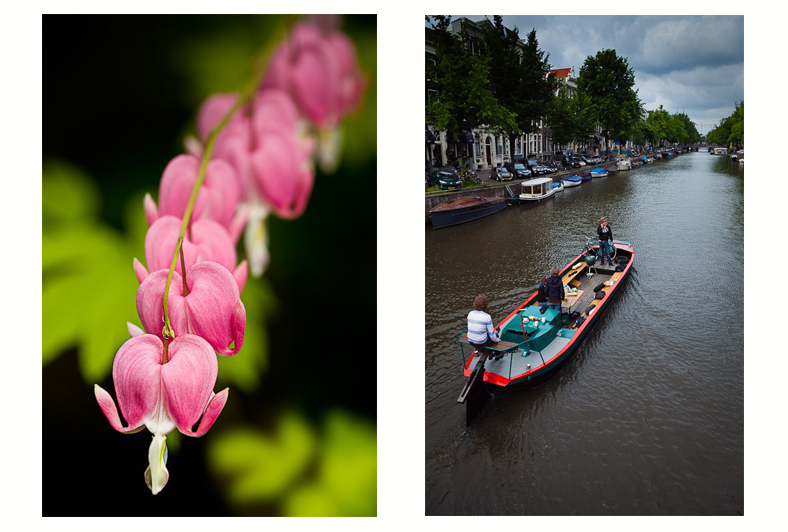
The two images above use size as one visual cue to the which elements are closer to the viewer, and which are further away. The flower also uses differences in sharpness to aid in creating an illusion of greater three-dimensional depth: the bloom that is both sharper and larger appears to us as being closer. The image of the Amsterdam canal boat uses relative size, as well as converging liners to create the illusion of depth.
There is also another visual cue that we can use to create or enhance the illusion of “three-dimensionality”: the relationship between light and dark tones in an image. All things being equal, areas in a picture that are lighter in tone will appear to advance toward the viewer, and those that are darker will appear to recede.
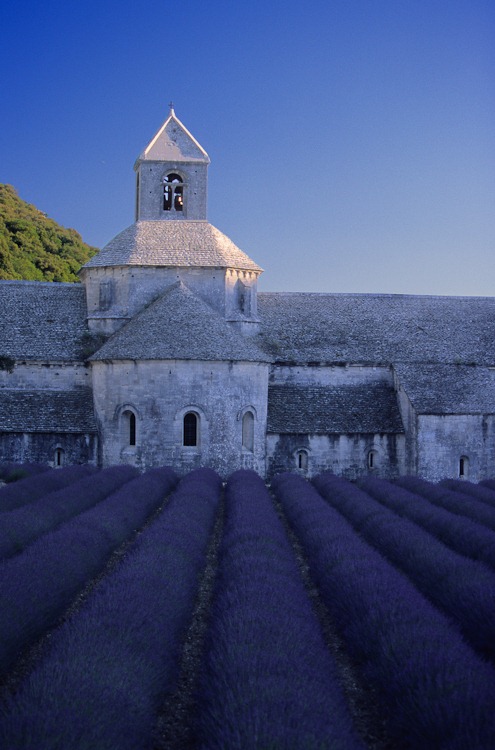
The Abbey Senanque near Gordes in Provence sits in a roughly north-south oriented valley. Because of this, by the time the sun rises above the surrounding hills, we are well past the the time of best light for this type of image. The situation is a little better in the evening, so I prefer to arrive just before the sun’s last rays leave the valley. By then the valley floor with its the rows of lavender in front of the abbey are in shade, while the bell tower is catching the last warm shafts of sunlight. While I liked the arrangement of shapes in the image, the lighting of the open sky makes the lavender appear flat and a bit lifeless. Lacking here is the impression of “roundness” of the rows of lavender plants. This is a good opportunity to work on the light – dark relationships in the foreground to re-create some of the dimensionality that is missing, but which is so immediately evident when standing in front of the Abbey. Creating the illusion of depth is a simple process of making the tops of the rows appear lighter than the ground between the rows. This difference in tone is already present to a small extent: all we are going to do is enhance what is occurring naturally. There are several ways to accomplish this task, but this is one that I like because it is simple to accomplish, and is easily controllable to create any effect you are looking for.
1) Begin by opening the image in Photoshop
2) Next, add a new layer by selecting Layer>New>Layer from the menu.

3) Set the Mode for this new layer to “Overlay” and select “Fill with Overlay neutral color (50% gray). Name the layer with a something descriptive… like “Dodge & Burn
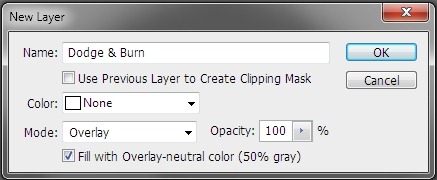
4) In overlay mode the neutral gray we have filled the layer with has no effect on the image at this point. If however we paint on the layer with a gray shade that is lighter than 50%, we will lighten the underlying tones in our image. Painting on the overlay layer with a shade of gray which is darker than 50% gray will darken the underlying tones in our image.
5) You are going to paint on the overlay layer with either white and black, so hit the “D” key to make sure your foreground and background colours are set to the Default black and white.
6) Begin by setting your foreground colour to white (if it isn’t, hit the “X” key to swap it so White is the foreground colour )

7) Pick up a soft-ish brush and size it for the areas you want to lighten
8 ) Set the opacity of your brush quite low, say around 10%. As we paint, we want to build up the areas that we are affecting slowly. It’s easy to overdo the effect of this adjustment. Also, set the “Flow” to something less than 50%: this will also help to build up the effect slowly.

9) Paint along areas you want to lighten. I painted along the tops of the lavender rows… adjusting the size of the brush as needed. If you work slowly and build up the effect gradually with a low flow setting, you don’t have to be extremely accurate in your brushing. Swap the foreground and background colours to make black the foreground colour (hit the “X” key), and paint in areas that you wish to make darker. I painted in the spaces between the rows of lavender in this image.
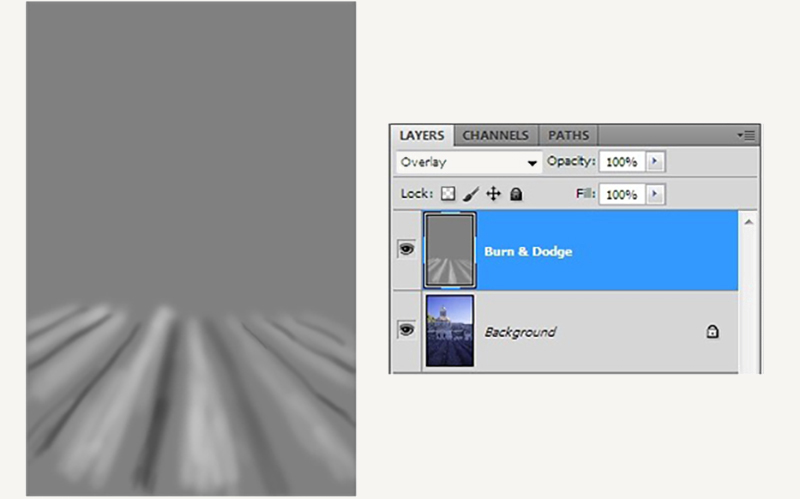
10) Here is my completed overlay layer, and the layer stack in Photoshop. If you wish you can further adjust the intensity of the effect by adjusting the opacity of the overlay layer.
And here is the completed image:
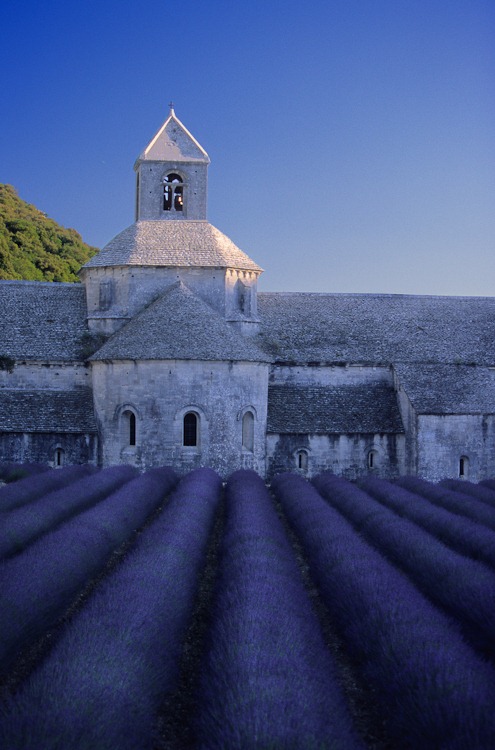
By playing on a few prejudices of our eye-brain visual system, we can easily restore some of the feeling of texture and three-dimensional form lost to the flat lighting of our foreground.
