Taming Lightroom’s Local Adjustment Tools
Lightroom has several local adjustment tools you can use to work on specific areas in your images, including the Adjustment Brush and the Graduated filter. Both have been criticized for been somewhat blunt instruments: lacking the precision of carefully masked adjustment layers in Photoshop. While it’s true that Photoshop offers the possibility of creating very precise local adjustments, it’s unfair to unduly criticize Lightroom’s local adjustment tools: they are more capable than some would have you believe.
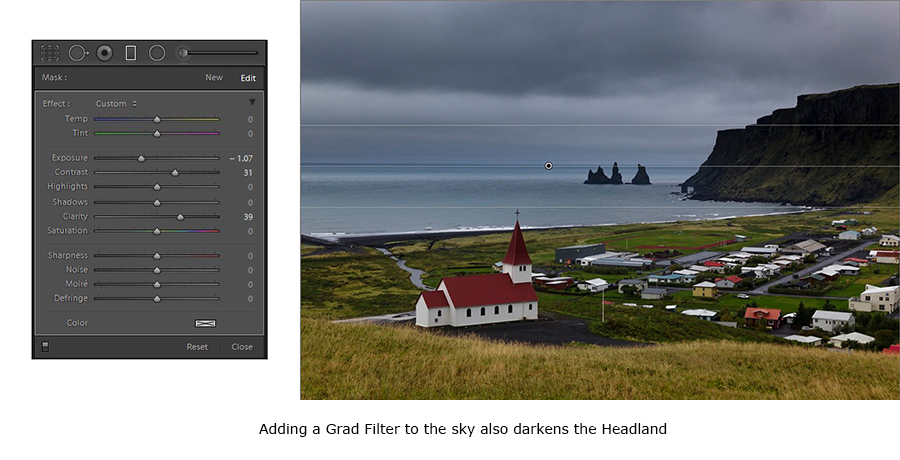
You might choose the Graduated filter to darken an overly bright sky. The problem though is that unless you are working with an ocean or prairie scene, with a perfectly flat unobstructed horizon, chances are your Graduated filter adjustment will end up darkening a portion of your landscape as well. Despite the fact that it was a very dark overcast day in Vik, on the south coast of Iceland, the sky was still very much brighter than the landscape below.
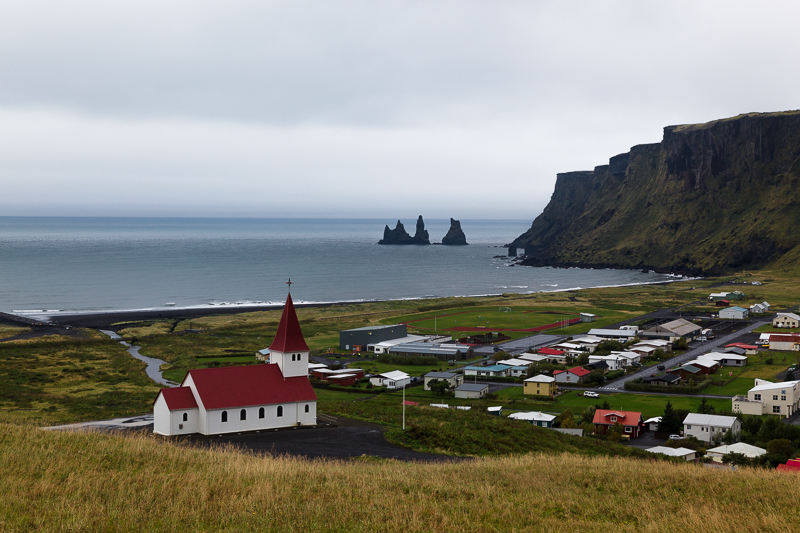
To retain that dark stormy look I applied a Graduated filter in Lightroom, adjusting the Exposure down and the Contrast slider up. This recovered the dark and stormy look I was after, but also unnaturally darkened the headland beyond the town.
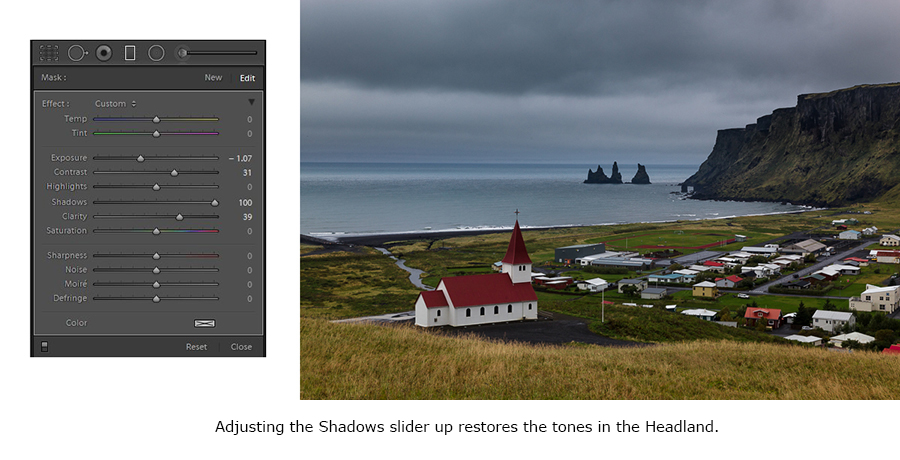
This is an easy fix. Remembering that the Shadows slider affects mainly the darker tones and not the mid-tones and highlights, I simply moved the Shadows slider up until the headlands returned to a more natural look.
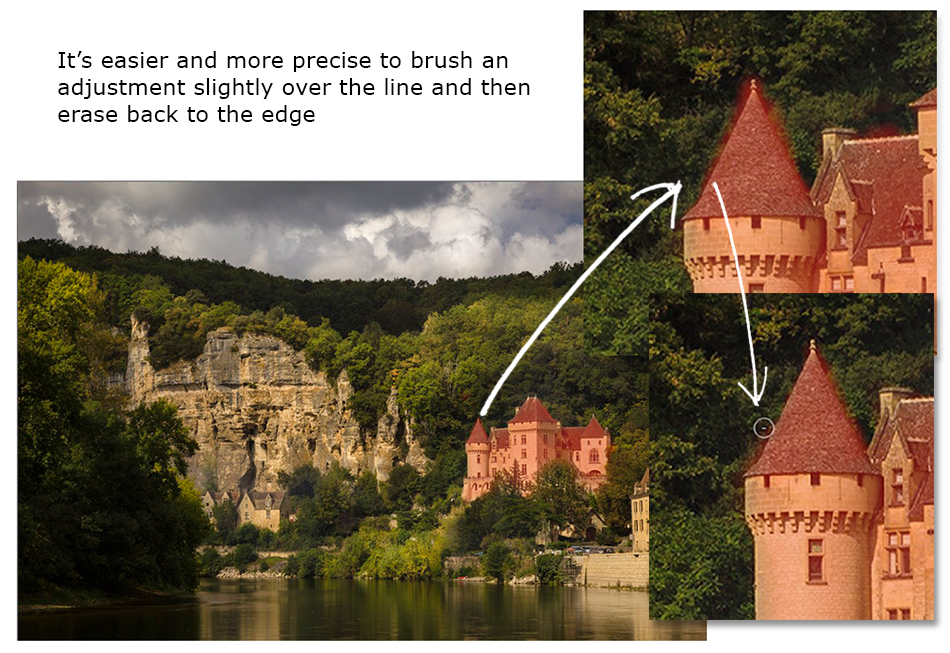
The local adjustment brush is enormously powerful. It is also maddeningly difficult to use if like me, you were one of those kids who always found hard to “colour within the lines” in elementary school. Instead of driving yourself crazy, just do the best you can. If the area you are brushing over is relatively even toned, turn on the auto-mask feature. This option senses the tone of the area you first click on with the brush tool and tries to avoid applying your adjustment when the brush crosses over into the area with very different tonality. However, there is a problem with auto-mask when you are brushing over an area with a lot of texture: auto-mask will interpret the texture as many different small areas of different tonality: some needing your brush adjustment, others not. You end up with a mottled effect which is likely not what you were after. It’s often easier in these situations to turn off auto-mask, and just do the best you can with the brush, then turn on the erase option and erase back up to the line. If the area you are erasing is relatively even toned, turn on the auto-mask feature and the erase tool will do an almost perfect job of erasing up to the line, but no further. I had been working on the image below, and while I was generally satisfied, I wanted to really make the Chateau, the primary focal point in the image. It was still competing with the enormous visual weight of the rock face on the Dordogne River near Roque-Gageac in France. Remembering that our human eye-brain visual systems are naturally drawn to warmly lit objects over those illuminated by cool light, and to those with higher contrast and saturation over those with lower contrast and saturation, I decided to add a local brush adjustment to just the Chateau, increasing the white balance (too warm the chateau up a bit), and to increase the contrast and sharpness subtly as well.
My problem, as has always been the case, was that I found it very hard to produce an evenly brushed result that remained with the roof line of the turrets. So I simply did the best I could and switching to the eraser tool, easily erased back to the outline of the Turret.
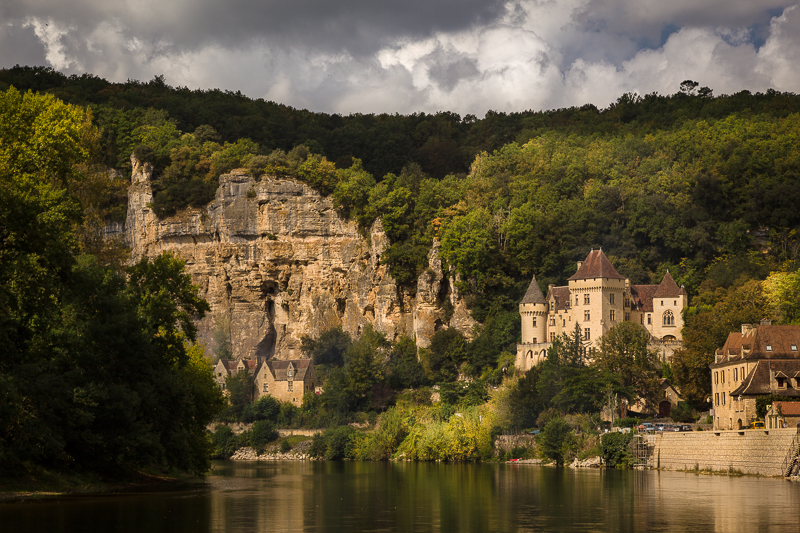
The result of the brushed adjustment is subtle, but allows the Chateau to command the viewer’s attention almost before anything else in the image
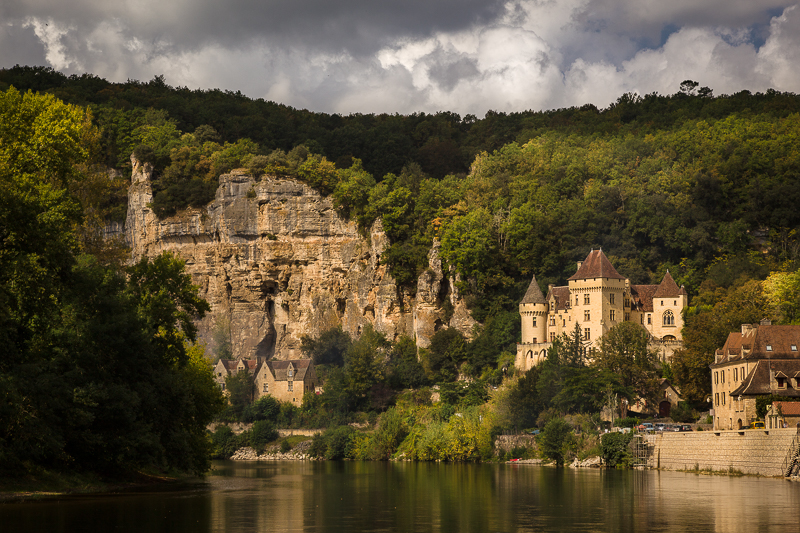
If you’re curious, here is the original image, straight out of the camera
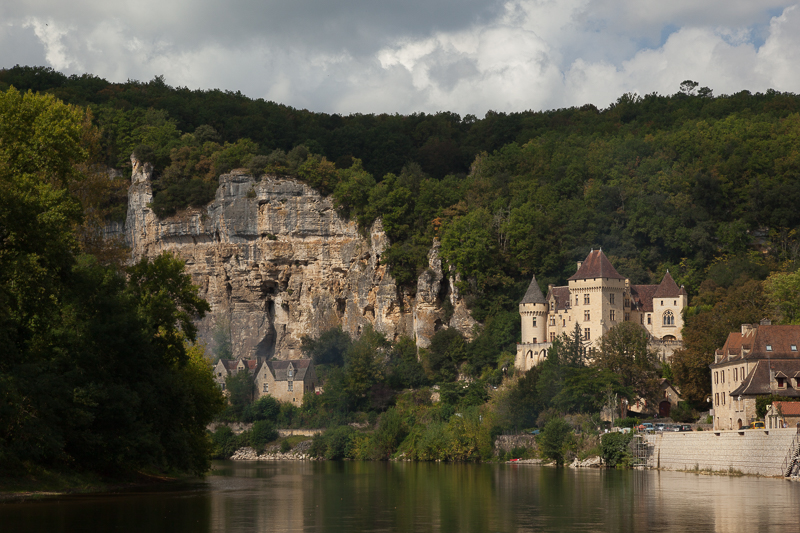
Now, you might say the edited image is not an accurate portrayal of the original scene, and you would be correct. The final image is however an accurate representation of what I felt that morning by the river bank, watching the sun periodically move in and out behind the clouds and fog hanging in the valley. It would from time to time illuminate first the Chateau, then a line of trees along a ridge, and then perhaps a spot on the river bank. The local adjustment tools in Lightroom allowed me to create the effect of sunlight falling on different areas of the image all a single frame. No Photoshop required.

