A polarizer is a basic filter which every photographer who works outdoors should have and know how to use. In many ways it’s the only filter, the effects of which can’t be fully reproduced in post using tools like Adobe Lightroom and Photoshop. But, it does have its limitations.
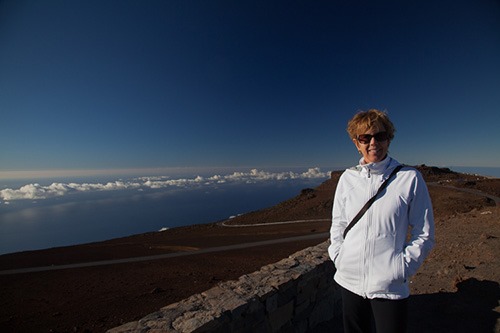
For one thing, you have to own one and have it with you when you are out shooting. It soaks up 1½ to 2 stops of light, slowing your shutter speed or opening your aperture. If you are using it to darken a blue sky, it works best when the sun is at right angles to the direction your camera is pointing, and not at all when the sun is behind you. On top of this, you really can’t use a polarizer to darken skies with lenses wider than say, a 35mm on a full frame camera. Anything wider than this encompasses such a wide field of view that the darkening effect will uneven across your frame, as in this image below
So, faced with the task of darkening the sky to add impact to this next image, what is the best approach “in post”? You might be tempted to simply crank up the saturation. You might think that you have to create a complex selection of the sky in Photoshop to mask off the foreground, and go work on just the sky. But the answer is much simpler. As with many other selective adjustment problems, the best approach is to simply let the image do the work for you.
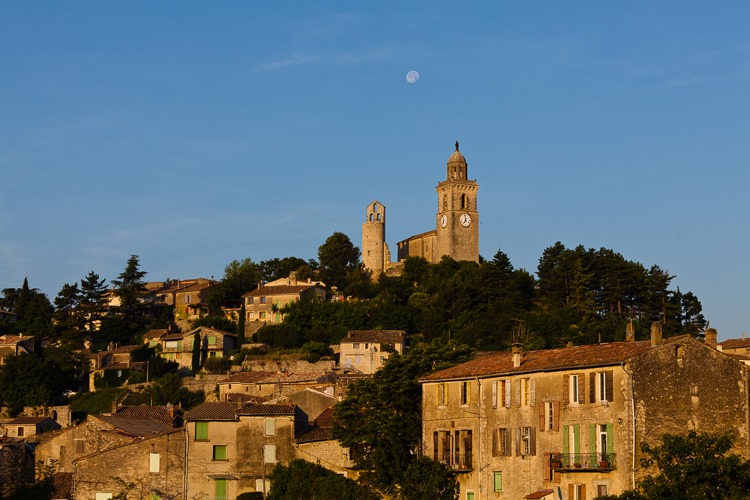
The image above is OK; the warm light of early morning complements the stone buildings of the Provencal town of Reillane. I’d really like to make the moon “pop” a bit more, and darkening the sky will also make the foreground buildings seem even warmer and more saturated. Since the sun is behind me, over my left shoulder, a polarizer would not work well here. When you are shooting in the warm light of early morning or late afternoon, the foreground subject will contain a much higher percentage of warm tones compared to the blue sky above (even more so with this subject). Knowing this, we can use the HSL controls in Lightroom or Adobe Camera Raw (“ACR”) to darken just the blue sky. The HSL (“Hue-Saturation-Luminance”) controls are located in the Lightroom Develop module, under the pane titled “HSL / Color / B & W”. We will click “HSL”
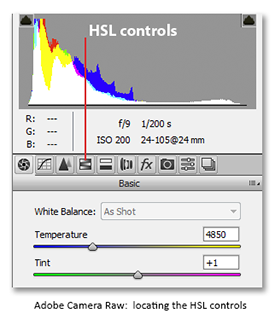
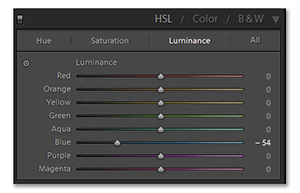
In ACR, the HSL controls are found by clicking the third button from the left (screen shot above). I’ll use Lightroom for the purposes demonstration; ACR is identical. The HSL controls are global in effect: whatever you do here affects all areas and all colours in your image. But, since the sky contains a much higher percentage of blue compared to the foreground, any adjustments you make using the blue sliders will have their greatest effect on the sky, and only minimal effect on the foreground. Because of this, we can use a global control to create a localized adjustment, making the image do the the work for us. Under the HSL Pane in LR, Click the “Luminance” option (the “Luminance” tab in ACR: on the left below)
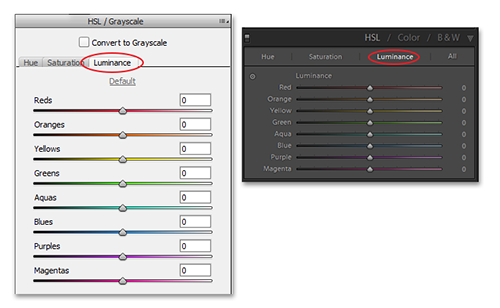
Now simply adjust the Blue Luminance slider to the left to darken the sky in a natural way. Notice that the foreground is largely unchanged with this adjustment; there is such a small blue component in the foreground colours that this adjustment has little if any effect on them. Don’t be tempted to use the Saturation slider under this pane. It will quickly make the blue sky appear garish and unnatural. It will also become difficult to print without the blues blocking up. For this particular image I chose an adjustment of -54 for the Blue luminance slider.
Which resulted in this:
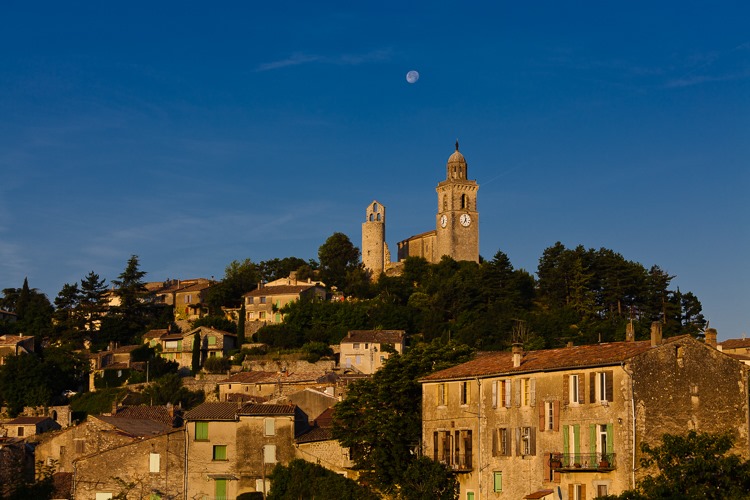
Now the Moon really stands out and the warmth of the stone buildings is enhanced as well.
Aside from working at all orientations to the direction of sunlight, this also works with extreme wide-angle lenses; both would be problematic with a polarizing filter.
Does this mean you can now leave your polarizer at home? Absolutely not! I started out by saying that the polarizer was perhaps the only conventional filter, the effects of which are difficult to reproduce entirely in digital post-production. A polarizer’s ability to remove reflections from wet foliage, water and other non-metallic surfaces, thereby saturating colour, can greatly enhance the impact of your images. So, you definitely want to have a polarizer in your camera bag.
Finally, here’s one last little trick to remember. At times, dSLR sensors end up reproducing blue skies with a slight cyan hue. To fix this, make a quick visit to the HSL tab, using the “Hue” option this time, move the Blue slider just a touch to the right. This will shift the blues just a bit to the magenta end of the spectrum and away from its complement at the opposite cyan end. Don’t overdo this, a little goes a long way, or you’ll end up with purple skies.
In my Introductory Printing course the primary focus is getting students to a point where they are in control of the technology; so that what emerges from their printer matches as closely as possible what they see on the screen. Along the way, by looking at each other’s images we discuss many simple adjustments, like the one we have been looking at here, to enhance the impact of our images in print.


